




Photobucket Photobucket Photobucket Photobucket Photobucket

Thursday, December 6, 2012

burlap tree skirt

 
All right friends,
I am super excited about this project,
because I am in love with how it turned out!
 
I needed a new tree skirt,
and I really wanted to go with the natural theme.
burlap, pinecones, rustic, greenery...
 
my last trip to Joann's
burlap was on sale for $2.49/yard
so I scored like um... 6 yards.
 
so without furthur ado,
let's make a tree skirt, shall we?
 
first, what you'll need
1.  burlap or any other fabric you want to use {at least 1 yard for your bottom layer and 1/2 yard for your top layer}
2.  red ticking or your own fabric choice to make into ruffles
3.  a sewing machine and thread
4.  scissors and straight pins
 

cut your first circle of burlap
I am totally lazy and just folded my fabric in half and eye-balled a circle
{keep in mind, I had no real plan in making this, but knew I needed some circles}


I just love this red burlap
and used this as my top layer.
I laid out the red burlap folded in half on top of my first circle
and again eye-balled it and cut another circle.
 

definitely not perfect
but that's ok
trust me! m'kay?
 
originally in my mind, I thought I would be done here, I even laid it under the tree,
and yikes, that looks terrible.
I needed to add some fun.
and what better way to do that than some lovely ruffles.
I had some red and white ticking that I decided to use for my ruffles.
 
I cut 4  2-inch strips for my bottom layer
and 3 for the top
run a baste stitch along one edge
and make your ruffles

love me some pretty ruffles.
I wanted frayed, natural edges so I didn't even hem mine
 

I cut a slit and a hole in the middle so that skirt could wrap around the tree.
I then sewed along the slit and hole to attach the 2 layers
then, go ahead and start pinning and sewing your ruffles in place.
this is where I was able to fix my less than perfect circles.

throw that baby under your tree...
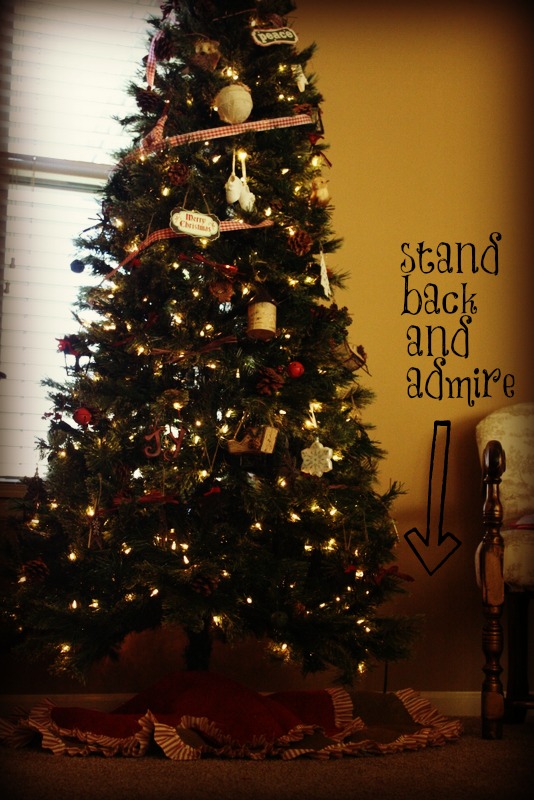
pat yourself on the back...

cost
burlap // 2.99 a yard on sale x 1 1/2 yards
ticking // 12.99 yard x 1/2 yard
thread 2.99
 

Photobucket

Wednesday, December 5, 2012

12 days of DIY christmas lovelies // Yarn Christmas Tree's


I absolutely love to decorate my home for the Christmas season.
and being my first year in my new home,
I was ready to hit the ground running.
Being on a budget,
I decided to hand make some of my christmas lovelies this year.

and I kind of went, well, overboard...
I made A LOT of lovelies.
and thought why not share with you...
I will say, that most of these projects are super easy,
so follow along for the next 12 days,
as I kick of my 12 days of DIY christmas lovelies...
Enjoy


Let's start with these super easy and totally adorable
Yarn Christmas Tree's


You'll need
1.  a styrafoam cone {found in the floral dept of your craft store}
2. yarn {I used olive green, deep red, and a creamy white}
3.  a hot glue gun
4.  scissors


Now, I am sure there are about a hundred different ways to do these,
however, I love my hot glue gun and so I went that route...
so....
start by adding a bead of hot glue around the base.
place your yarn around the base of the cone making sure to push it all the way along the bottom edge.
next, wrap your yarn around the cone.
no rhyme or reason here.
I quickly wrapped the yarn up about 4 inches and then I went back down, winding the yarn in layers to cover the empty spots where the styrafoam was.
I found doing this was easier than trying to be systematic and fill in the empty spaces as I went,
and also liked the look better.  It gave it more texture.
anyways...
continue your wrapping method all the way up the cone,
once you get to the top
add some more hot glue,
and place your yarn in a circular shape at the top to secure it.
as long as you keep the yarn tight, no glue is needed in between


super easy! 
and the cost...
yarn // on sale at Joann's $2.99 each
cones // ranged from $3.99 - $6.99 each


Photobucket

Tuesday, December 4, 2012

a very special visitor

 
Recently,
we had a very special visitor arrive at the front door.
Yes! at the front door.
From Santa himself.
He delivered our "Elfie"


With a christmas card and a letter from the big guy himself.
The door bell rang, and Presley answered the door to find "Elfie", a present,
and the Elf on the Shelf book at the door step.


she of course went right for the present...


and with some encouragement found her card.


Daddy read her the letter from Santa,
which explained to Presley
that Elfie was back for this holiday season
and would be keeping an eye on her
and reporting to Santa himself on her behavior every night.
He also told her that he wanted her to work on a few things before Christmas.
One being, Listening to her parents
and sleeping in her big girl bed instead of mommy and daddy's bed.
He sent a gift.
Christmas jammies, so Presley would know that Santa is keeping an eye on things
and would hopefully encourage her to sleep in her bed.


Welcome Elfie.
Work your magic my little friend,
for I love when you are here!


Photobucket

Monday, December 3, 2012

a belated thanksgiving recap

a little late yes, however, I wanted to share some thanksgiving pictures...
last year when the hubbs and I were "homeless" {ok not really, but we like to be dramatic}
we vowed to have every holiday this year in our new house..
and thanksgiving was no exception.

I was thrilled to have my family over for the holiday to celebrate and give thanks and drink some beverages.  and that is what we did!  Oh! and stuffed our faces.  It was the first time that my formal dining room had been used {for its purpose anyways}, and I absolutely loved playing hostess.

Enjoy these late photos.


December is going to be an exciting month here on the bloggie.
 {or at least I think so}
Come back m'kay?  I have so much planned!!


Photobucket

Saturday, December 1, 2012

It's the most wonderful time of the year...

It truly is the greatest time of the year...
I mean besides the cold, and the snow, it's not too bad.
Christmas has become a little nearer to my heart with this little sweetheart running around...


speaking of little sweethearts...
I had the opportunity to take place in an ornament swap hosted by the lovely Erin // Living in Yellow and the fab Jessah // Dreaming of Dimples.  I mean who doesn't love ornaments and meeting new bloggie buddies!  So of course, I signed up to participate. 

I found my swap mate, the sweet Hallie // Life: Oceanside and immediately starting stalking checking out her blog space.  I learned several things about Hallie, like her belief in gaurdian angels, the fact that she moved from Minnesota to Florida, hence the title Life: Oceanside, you clever little thing Hallie!  that she has a love for fur babies and a huge heart, and Oh! yea! she is engaged and planning her wedding.

I knew exactly what I wanted to get her for this #ornie {thanks Erin for dubbing this term} swap.  Hello, a bride-to-be, first year of marriage ornie!  Perfection.  I love to support handmade and so automatically went to search on etsy for the perfect gift that fit in my budget.  after much searching and stewing {I like to be a good gift giver}, I came up with this .  The store rocked my socks off and they were so great about gift wrapping and communication.  Win! Win! all the way around. 

So Merry Christmas Hallie, enjoy your wedding planning and your first year with your new hubby, and of course many years to come!  Congrats! you are a doll and I will be back to stalk say hi again!

But Wait! OH SNAP!  this is a swap right?  why yes it is.. and that means not only did I get to meet the lovely Hallie, but I got a lovely little package in the mail as well, from the super fun Eliza // Case Study.  Not only is she super awesome, but she shares with me the first half of my name, which hello, sweetness.

I fell in love with the colors and design of her blog, and of the lovely pictures she infuses in her posts!  It's a match {said in my best SNL target lady voice}.  And I was doing a happy dance at the mail box when the package came! 

*happy dance, happy dance*


 Upon arrival of Rudolph, {our #ornie} named by Presley, we had to do some picture taking to make him feel at home.  and showcase some of our best cheesey smiles possible...


Welcome home Rudolph.  He fits nicely with my decor and is glittery and has shaky legs {a term used to describe by yours truly PJ}.  Thanks Eliza... It has been so fun to make some new friends, Rudolph included, and really kicked my Christmas spirit into high gear. 


Oh and I'd like to apologize for being a totally lousy blogger lately. 

but Oh Wait! Hear me out!!
I can explain.  I am getting ready to launch my store opening and have been one busy worker bee getting things prepared.  Now that we are getting close to opening, I have some more free time on my hands to sit down and pour my heart out on my bloggie!  and I have a TON of awesomeness planned for December, so for reals, check back, especially if you love DIY projects and Christmas.  {hint, hint}.

Ok, my little reindeer, I have to run!  It's my weekend to work so I'm outta here!  Did anyone else see that full moon a few nights ago?  Yes, well think of me when you look at it because it's true what they say about the full moon and pregnant ladies popping out babies!  that's right, should be a good night!

thanks again to  Erin and  Jessah for putting on this little shin dig! 
Photobucket

LinkWithin

Related Posts Plugin for WordPress, Blogger...